Amazing coffee makers with single-use pods like Keurig can brew your drink in less than 10 minutes. Learn how to work the Keurig coffee maker to have delicious beverages, plus useful tips to maintain the machine quality in the long run. Overall, this article includes:
- 6 Easy Steps To Work The Keurig Coffee Maker
- Top 4 Common Issues And How To Fix Them
- How To Maintain The Keurig’s Pristine Condition
- Tips To Choose The Right Keurig For You
Whether you’ve just received the Keurig coffee maker or are considering getting one, this guide will help you understand the basics of a Keurig machine. Let’s dive into the first section.
Contents
6 Quick And Easy Steps To Work The Keurig Coffee Maker
The following 6 steps are essential for starting the machine safely and swiftly.
Step 1: Prepare The Machine

First, get your Keurig out of the box and set it on a flat, dry surface with a power outlet nearby. Next, find the water reservoir on the left side of the machine. Remove the reservoir and fill it with water up to the Max line indicated on its body.
I’d recommend you use soft water since tap water tends to cause Calcium build-up, which can clog the pump. Once you are done, place the cold water reservoir back to the machine.
For a built-in reservoir, navigate the lid on the top left, then use a separate container with a spout to pour water in. The container helps you avoid spilling water everywhere.
Step 2: Make A Test Brew
Look for the power button on the top right of the machine. Turn it on and wait for the Keurig to heat the water to 192 degrees Fahrenheit.
If the unit has a water heating light, this light will turn off when the process is completed. In case you don’t find any indicator light, you can rely on the heating sound. The water is ready when the sound stops.
Place a 10 oz. cup at the center of the bottom tray, then choose the largest brew size by tapping the touchscreen or pressing the button. At this point, the machine will perform the brewing process and pour water into the cup.
By doing this step, you can determine if the unit performs as expected. A clogged machine or strange sound calls for a cleaning session. With the Keurig working properly, discard the water and proceed to step 3.
Step 3: Insert The K-cup

Keurig machines use a K-cup, a plastic pod made to fit a coffee chamber, commonly known as the holder, in the machine. Each K-cup contains coffee or tea grounds with a wide range of options, from latte, hot chocolate to decaf beverages to minimize the healthy intake of caffeine.
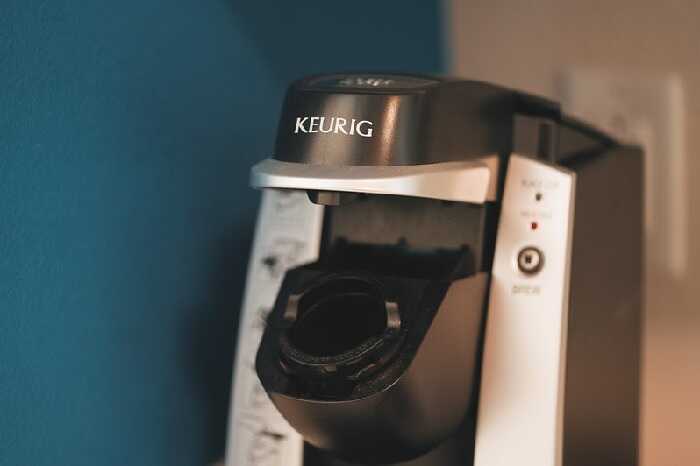
Start by lifting the silver lid of the Keurig to find the K-cup holder. Next, insert the coffee pod into the holder and close the lid. At this point, the screen will show the Ready To Brew status. If you are working with the classic models, then the Brew Size button will blink.
One thing to note is always to keep the foil lid on the pod. Every Keurig coffee maker has a needle to pierce through the foil, ensuring a closed process. Having the foil lid on also keeps your machine safe from coffee spillage.
Step 5: Choose A Brew Size
While the regular cup size for single-use coffee makers is 10 oz., you can choose other sizes depending on the machine’s capacity. Keurig units offer a fixed volume or various volumes in the control panel. The options available are 6, 8, 10, or 12 oz.
On the first time using the machine, I’d recommend you choose the smallest volume. With this practice, you can still fill the cup if the quantity is insufficient. Plus, you will know which cup is suitable for your needs.
Step 6: Brew Your Cup Of Coffee

Navigate the Brew button or the option on the touchscreen, then press it and wait for the Keurig to brew. The brew cycle starts with the unit taking in hot water, processing the coffee grounds, and dispensing a hot coffee cup on the spot.
After the Keurig finishes brewing, lift the silver lid, take the empty pod out, and throw it in the nearest trash bin. If you want to enjoy another drink, you can insert a new beverage pod and start brewing right away.
Top 4 Common Issues And How To Fix Them
Now that you have learned the foundation steps of how to work the Keurig coffee maker, you will move on with the Keurig troubleshoot guide to identify and solve the common flaws.
Insufficient Quantity

If the beverage volume turns out to be smaller than expected, it’s most likely your machine is clogged. A quick solution is running about 3 to 4 rounds of test brew by applying step 2 in the guide.
This process will remove most of the coffee residue clogged in the pump and allows the Keurig to complete one or two drinks.
Machine Not Heating
There are 2 potential causes of the heating issue:
- A clogged water pump.
- Misplaced or damaged parts due to external impacts on the machine.
Resetting the unit once will help you identify the cause. Here’s how to reset the Keurig coffee maker:
- First, turn off your Keurig. Then unplug it and wait for 2 minutes.
- Next, remove the water reservoir and open the K-cup holder.
- Plug the machine in, turn the power on for a minute, then turn it off. Wait for another 2 minutes.
- Place the reservoir back in and close the K-cup holder. Make sure you install the parts correctly, then turn the machine back on.
The Keurig should function properly at this point. If not, you can conclude the problem lies in the water pump. I’ve covered the steps for cleaning a Keurig in the third section of this article.
Machine Turning On Or Off Automatically
The latest Keurig models have an automatic shut-off feature that you may have missed. This factor makes the coffee machine look like it’s malfunctioning.
On the touchscreen, look through the settings, and you will find the option to switch this feature off. Note that this automated brewing feature can be useful if you brew coffee at the exact time every day.
Leaking Problem
A misplaced reservoir or K-cup pod is the culprit for leakage. Another issue can be a crack in the reservoir.
Start by turning off the coffee machine. Then, remove the reservoir and place it on a dry surface to check for water leaking out of the bottom or the body. A crack in the reservoir calls for an immediate replacement.
Once you’ve confirmed this part is fine, re-install it on the machine. When you insert the K-cup into the holder, make sure the pod fits correctly.
How To Maintain The Keurig’s Pristine Condition

A clean coffee maker can last for a longer time and delivers higher-quality beverages. You can apply this maintenance process once a week:
- Before you start, switch off the power button. Make sure you clean the machine when it has cooled down.
- First, unplug the machine. Next, remove the water reservoir and the bottom tray. Then, lift the silver top and remove the K-cup holder. Prepare a sink of hot water and pour in a few drops of mild dish soap. Dip a cloth in this mixture and use it to wash all the parts thoroughly.
- Work your way through the details to remove all debris and coffee grounds. Afterward, rinse with fresh water at room temperature. For tough debris, use the pressure from the running tap to remove it while rinsing. Wipe these internal components with a dry cloth.
Alternatively, you can perform the cleaning process without removing the parts. Unplug the unit and fill half of the water reservoir with white vinegar. Fill the other half with water. Then, do a few rounds of test brews. This process is a closed cleansing brew cycle.
You can use this method once every 2 or 3 days, as this period is not long enough to accumulate a lot of debris in the machine.
Tips To Choose The Right Keurig For You
This final section covers the factors to help you choose a suitable Keurig coffee maker in a sea of products. In short, there are 3 factors:
- Reservoir capacity: Depending on many drinks you tend to have per day, you can choose the corresponding water reservoir capacity. The machine should run for a while without requiring frequent reservoir refills.
If you are placing the unit in an office with many coffee drinkers, prioritize options with adjustable brewing sizes, ranging from 6 oz. to 12 oz.
- Types of drink: While the fixed temperature for a regular coffee maker is 192 degrees Fahrenheit, newer Keurig models have temperature adjustments. This feature is more suitable if you want to customize your cup of coffee.
- Space: Amongst the Keurig products on the market, the compact coffee maker can fit the home office, and larger options require a kitchen counter. Make sure you have decided on where to place the machine to get the right dimensions.
Conclusion
After reading this article, I hope you have solved the mystery of how to work the Keurig coffee maker. Overall, the Keurig machine has a minimal design, and the brew settings are easy to use, even for beginners.
Before you start the unit, always set it up on a balanced and dry surface near a power outlet. For new machines, run a test brew to ensure the parts are assembled correctly. When you insert the K-cup, make sure it fits the holder to avoid spillage.
Common issues such as insufficient drink volume or leakage are usually caused by a clogged machine. Therefore, it is advisable to maintain a weekly cleaning session to have the Keurig brewing smoothly.
The Related Article
Comparison Articles
- Keurig K155 VS K150
- Keurig K Elite Vs K55
- Cuisinart SS-10 vs Keurig Elite
- Keurig K250 vs K200
- Keurig K-Duo Vs K-Duo Essentials
()

